
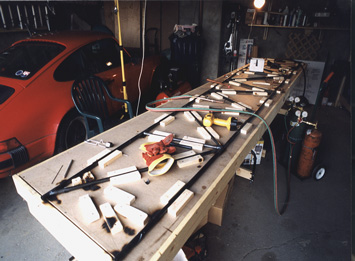
Fuselage construction begins by carefully laying out the fuselage side on the construction table. Dimensions past the fuselage bend must be adjusted to compensate for bend. The centerlines of tubes are laid out, then actual edges of tubes can be plotted from there. Many small blocks of wood are screwed down to locate tubes. The longerons are built by making a fishmouth in the 7/8 tubing, and sliding in 3/4 tubing as per the plans. I added rosette welds at these joints as well. The longerons are then placed in the blocks on the table. The lower longeron get heated and bent upward. Go slowly and it's easy. Then the truss is built by cutting and fitting all the inside tubes. There are a lot of different methods for fitting–I found the easiest to be simply lay the tube over the longerons and mark with a silver pencil. I bought a joint jigger, but rarely used it–it took longer to adjust it then to simply cut the tube with a hacksaw and shape the mouths on a bench grinder with a radiused wheel. (Use a wheel dresser to shape stone to desired radius) I would fine tune the joint with a variety of half round and rat tail files. One important point is to not make the joints too tight–a little space is desireable, otherwise distortion will result during final welding as the tubes expand during heating. At each cluster, a small hole was drilled to allow heated gasses to pass during welding (preventing blowout of weld) and to allow tubing oil to be added later for internal corrosion protection. After the tubes are fit, they can be tack welded. After a little practice, making the joints became second nature, and the thinwall tubing cut like butter with a 32 tooth per inch hacksaw.